
Tuckpointing a Chimney: When Mortar Joints Fail
Chimney tuckpointing repairs failing mortar joints before freeze-thaw damage reaches the brick. Learn what the process involves and when it is needed.
Too Long To Read
- Water, failed mortar, cracked crowns, missing caps, and movement are masonry problems that need inspection before repair scope is chosen.
- Repair sequence matters: stop water entry, confirm structural condition, match mortar to the brick, then decide whether sealing, tuckpointing, repair, or rebuild is appropriate.
- Do not use city age, neighborhood age, or generic price ranges as a substitute for roof-level masonry findings.
- Source check: this article is cross-checked against IRC masonry chimney provisions, NPS repointing guidance, ASTM C270 mortar specification, and GLISA climate resources.
Chimney tuckpointing is the process of removing failing mortar from the joints between brick courses and replacing it with fresh mortar that restores the weathertight seal. It is the most common masonry repair performed on Chicagoland chimneys, and for good reason: mortar joints fail before the brick does in nearly every case, and catching that failure at the tuckpointing stage is far less expensive than addressing it after freeze-thaw damage has reached the brick face.
When mortar joints are open, water enters the masonry and freezes. Water expands as it freezes. Across the roughly repeated freeze-thaw cycles that inland Kane County and Cook County experience each winter, a small opening becomes a structural one within a few seasons.
How Mortar Joints Fail in Chicagoland Chimneys
Mortar joint failure follows a predictable sequence. The outermost face of the mortar joint is the first to erode, beginning with the carbonation and weathering of the binder material. As the face erodes, the joint becomes recessed, then crumbly, then absent. Once the joint is open more than a few millimeters, water enters the core of the masonry and the freeze-thaw mechanism accelerates the failure.
The failure also spreads vertically. Open joints in the lower courses allow water to run down inside the chimney and wet the mortar in adjacent courses. A tuckpointing job that addresses visible exterior joint loss while ignoring the crown condition and the upper courses may not address the primary water entry point.
The Right Mortar for the Job
Mortar selection is the most consequential technical decision in a tuckpointing project, and it is also the most commonly mishandled one.
ASTM C270 governs mortar types and their minimum compressive strengths. The types relevant to chimney tuckpointing:
- Type N: Minimum compressive strength of 750 PSI. The standard for above-grade residential chimney work. Appropriate for most Chicagoland chimneys built after 1920 with standard fired brick.
- Type S: Minimum compressive strength of 1,800 PSI. Used for higher lateral load applications. Not appropriate for typical chimney repointing because its rigidity exceeds what the brick can accommodate during thermal movement.
- Type O: Minimum compressive strength of 350 PSI. Appropriate for soft or historic brick with low structural loads. Used on pre-1920 construction where the original brick is known to be soft.
The governing principle for historic masonry, per the National Park Service and ASTM C270 guidance, is that the mortar must always be softer than the brick it joins. Soft historic brick is porous and flexible by modern standards. If the mortar is harder than the brick, the brick face spalls as the two materials attempt to accommodate thermal and moisture-driven movement differently. This is irreversible.
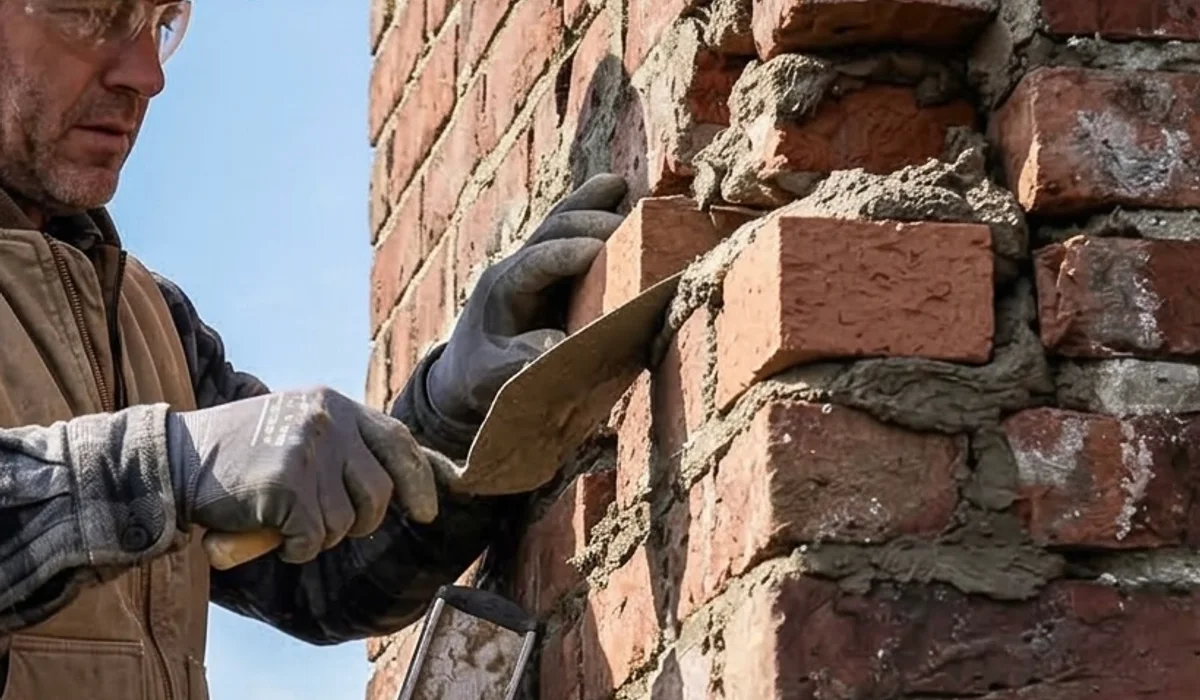
What the Tuckpointing Process Involves
Removing the old mortar. The first step is cutting or grinding out the deteriorated mortar to a consistent depth, typically 3/4 inch to 1 inch, which provides enough depth for the new mortar to key into the joint and hold. Using a grinder that is too aggressive or cutting too deep can damage the brick arris (the edge of the brick at the joint face), which creates a larger problem than the one being fixed.
Preparing the joint. The joint is cleared of dust, chips, and any standing moisture. Wetting the joint slightly before packing mortar prevents the dry brick from drawing moisture out of the fresh mortar too quickly, which would cause the mortar to cure before it bonds properly.
Packing the mortar. Fresh mortar is packed into the cleaned joint in layers, tooled to match the existing joint profile, and allowed to cure under appropriate conditions. Mortar should not be applied when temperatures are below freezing, and should be kept from drying too fast in direct sun by light misting or shade.
The full chimney sweep. After tuckpointing, any mortar that fell into the flue during grinding or packing should be cleared. A chimney cleaning vs inspection assessment documents what else needs attention alongside the tuckpointing work.
When Tuckpointing Is Not Enough
Tuckpointing is appropriate when the mortar has failed but the brick faces remain intact. When freeze-thaw damage has progressed beyond joint loss into actual brick face spalling, tuckpointing alone does not address the structural problem. Spalling chimney brick covers the next stage of failure.
Similarly, tuckpointing addresses the masonry joints but does not seal the crown, replace the cap, or repair flashing. In most cases on a chimney showing significant joint loss, the crown should also be inspected. A cracked crown is often the entry point that allowed water to reach the upper courses in the first place, and tuckpointing the upper courses without addressing the crown source means the freshly repointed joints are immediately subjected to the same water load.
The Tuckpointing Cadence for Postwar Chimneys
For postwar masonry chimneys in inland suburban areas, a tuckpointing job done with compatible mortar on well-maintained brick typically holds 25 to 40 years before the joints need attention again. The cadence is shorter for chimneys that were not covered by a cap during that period (an open, uncapped chimney allows direct water entry that accelerates joint failure), and for side-of-house exterior chimneys with maximum weather exposure.
Tuckpointing and What Comes After
Tuckpointing restores the mortar joints, but it does not address the conditions that caused the joint loss in the first place. On most older chimneys, the primary water entry point that has been driving the joint deterioration is above the joint failure itself. A cracked or deteriorated crown allows water to infiltrate the top of the chimney and run down the inside of the masonry column, wetting successive mortar joints as it goes. Tuckpointing without assessing and addressing the crown restores the exterior surface while leaving the water source intact.
The chimney cap and crown post explains why the crown is the first line of defense for the chimney as a whole. The why chimney leaks when it rains post covers the full water infiltration sequence from multiple entry points.
For chimneys where the tuckpointing work has been completed and mortar is in good condition, chimney waterproofing is worth considering as an additional protection layer. A penetrating waterproofer applied to sound masonry after repointing slows the rate of future moisture infiltration without trapping internal moisture. This is particularly relevant for side-of-house exterior chimneys in Elk Grove Village and Schaumburg that take direct weather exposure on multiple faces.
Assessing Your Chimney Before Tuckpointing
The right sequence before any tuckpointing work: an inspection documents the extent of joint failure, confirms the brick type and appropriate mortar spec, identifies any concurrent crown or cap issues, and produces a scope that addresses all contributing factors in one mobilization. See chimney masonry repair for how tuckpointing fits within the broader masonry repair picture.
NFPA 211 is the industry standard commonly used for annual inspection planning on chimneys in service. For older masonry chimneys, that annual assessment is the mechanism by which joint loss is caught at the tuckpointing stage rather than after brick damage has set in.
Schedule Your Tuckpointing Assessment
Delta - Chimney Repair and Services has handled masonry tuckpointing on Chicagoland chimneys since 1987. We write the mortar specification to the brick after inspecting in person, and we provide a written estimate before any work begins. We serve Geneva, Batavia, Schaumburg, and Elk Grove Village, along with Cook, Lake, and Kane County communities throughout Chicagoland.
Call (847) 685-1043 or use our contact form to schedule an inspection. A written estimate needs an on-site assessment.
The mortar must always be softer than the brick. On a 130-year-old chimney in Geneva or Batavia, applying modern Portland mortar to historic soft brick is a repair that creates a worse problem than the one it fixes.
Sources and Standards
- ASTM C270: Standard Specification for Mortar for Unit Masonry ASTM International Mortar types and minimum compressive strengths used in chimney masonry repair.
- NFPA 211: Standard for Chimneys, Fireplaces, Vents, and Solid Fuel-Burning Appliances National Fire Protection Association Defines the three chimney inspection levels and the annual inspection standard.
- Preservation Brief 2: Repointing Mortar Joints in Historic Masonry Buildings U.S. National Park Service Guidance on matching mortar for historic and soft-brick chimney repair.
- Great Lakes Freeze-Thaw Climate Data GLISA, University of Michigan Freeze-thaw cycle data for the Great Lakes region.
- International Residential Code, Section R1003: Masonry Chimneys International Code Council Code provisions specific to masonry chimney construction.
Fact-checked against the above sources on 2026-05-21.
Masonry & Tuckpointing FAQs
01 What is chimney tuckpointing?
02 How do I know if my chimney needs tuckpointing?
03 What mortar type is used for chimney tuckpointing?
04 Can I tuckpoint a chimney myself?
05 How long does chimney tuckpointing last?
06 Does tuckpointing require a permit?
More Masonry & Tuckpointing Guides
How Weather and Lake Michigan Affect Chimneys
Lake Michigan chimney damage on the North Shore follows predictable patterns. Learn how lakefront climate accelerates mortar failure, crown cracking, and liner deterioration.
Read article Seasonal MaintenanceSummer Is the Best Time for Major Chimney Work
Summer chimney repair lets mortar cure properly, contractors are available, and you beat the fall rush. Here is why summer scheduling pays off.
Read article Chimney SafetyHow to Tell If Your Chimney Needs Immediate Attention
Chimney warning signs that require immediate action: smoke entry, carbon monoxide, active chimney fire, and structural failure. When to leave first and call emergency services.
Read article Chimney RepairChimney Liner Replacement: Process and Materials
Chimney liner replacement on Chicagoland homes: when it is needed, what material options exist, and how the process works from inspection through installation.
Read articleHave a Question About Your Chimney?
Documented condition, a plain explanation, and a recommended scope before any work.