

Chimney Flashing Problems: How to Tell Which Part Is Leaking
Chimney flashing problems produce distinct stain patterns depending on which component failed. Match what you can see from the ground, attic, or inside the house to the likely cause before you call for repair.
The short version
- Chimney flashing problems produce a specific stain pattern depending on which component failed: step flashing, counter flashing, base or apron flashing, an absent cricket, a through-pan, or the crown or masonry misread as a flashing issue.
- Ceiling staining directly below the chimney usually points to the crown or cap, not flashing. Staining beside the chimney, along the roofline, points to step or counter flashing.
- A chimney set partway up a roof slope with no cricket behind it collects the water and debris draining off the entire roof section above it, which accelerates failure at that one joint.
- Smearing sealant over a failed counter flashing joint is the most common wrong fix. It covers the gap without restoring the lapped metal geometry that actually sheds water, and it typically fails again within a season or two.
- Every observation in this guide is made from the ground, from a window, or from inside the attic. None of it requires getting on the roof.
Chimney flashing problems are the largest single source of chimney-related search demand on this site, and also one of the hardest for a homeowner to self-diagnose, because “the flashing is leaking” can mean five or six different failures that look similar from a water stain but call for different repairs. This guide is a symptom-to-component map: what you can observe from inside the house, in the attic, or from the ground, and which flashing element that observation most often points to. For the causes behind each failure and what the repair itself involves, see the chimney flashing leak post; this guide is the diagnostic companion to it.
Read This From the Ground, the Attic, or Inside the House
Every symptom described below can be checked without setting foot on a roof: a ceiling or attic stain, a rust streak on siding you can see from the yard, or brick staining inside the fireplace surround. Confirming the exact failure at the flashing itself, and repairing it, is roof work that belongs to a professional inspection. Use this guide to narrow down what is likely happening before you call, not as a set of roof instructions.
The Flashing Assembly: What Each Piece Is For
A chimney flashing system is several separate metal pieces working together, and a “flashing problem” can mean any one of them:
Step flashing is a series of small L-shaped metal pieces woven into the shingle courses along the sides of the chimney, each one lapped over the piece below it, carrying water down and off the roof rather than letting it run against the chimney face.
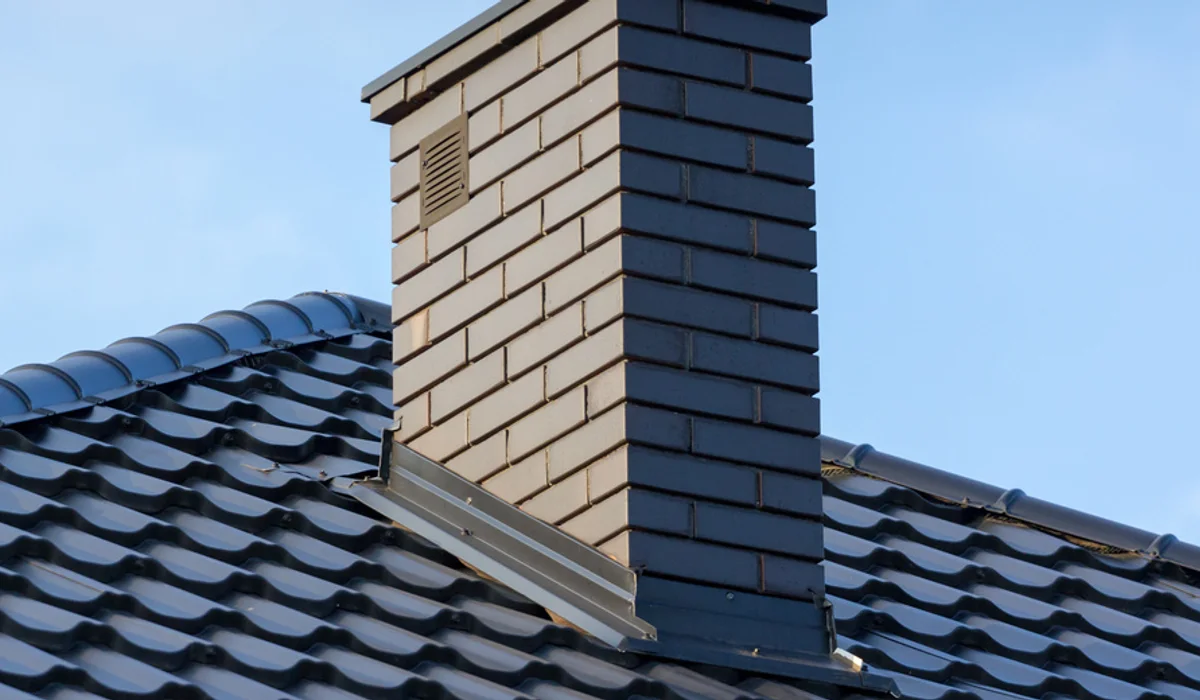
Counter flashing is the metal band embedded in the chimney’s mortar joints, usually set into a cut groove called a reglet, that laps down over the top edge of the step flashing. It is the piece most visible from the ground, running along the chimney at roof level.
Base or apron flashing sits at the front, downhill face of the chimney, the first piece water hits as it comes off the roof above the chimney.
A cricket or saddle is a small peaked structure built behind wider chimneys to split water and debris around both sides instead of letting it collect against the uphill wall.
A through-pan is used on factory-built and some insert-vented chimneys instead of woven step and counter flashing: a single formed metal pan that the chimney chase sits on, sealed at its edges to the roof deck below.
Any one of these can fail independently, and on an older chimney more than one often fails around the same time. The chimney flashing repair page covers what a full assessment and repair of this system involves once the failing component is identified.
Stain Directly Below the Chimney, on the Ceiling
If the water stain sits centered on the ceiling, more or less straight down from where the chimney passes through the roof, the most likely source is not the flashing at all. It is the crown, the cap, or the through-pan on a factory-built unit, water entering at the top of the chimney and running straight down the inside of the chase or flue to the point where it can escape into the room below. This is one of the most common misdiagnoses homeowners make on their own: flashing gets blamed and resealed, and the stain returns because the actual entry point was never at the roofline. The chimney crown repair page covers the crown-specific version of this failure.
Stain on the Wall or Ceiling Beside the Chimney, Not Directly Below It
Staining that is offset to one side of the chimney, closer to a wall than centered underneath, points toward step flashing or counter flashing on that side. Water entering at a lifted step flashing seam or a separated counter flashing reglet runs down the inside of the wall cavity nearest the failure rather than dropping straight down through the chase. If the stain consistently appears on the same side of the room relative to the chimney, that side of the roof is where the flashing failure is likely located.
Staining That Only Appears After Wind-Driven Rain
A stain that shows up only during storms with strong wind, and stays dry through ordinary steady rain, usually means a small gap: a hairline separation at the counter flashing reglet, or a step flashing edge that has lifted slightly but is still mostly seated. Flashing is designed to shed water running downhill under gravity. Wind that drives rain sideways or up under a lifted edge defeats that design in a way calm rain does not. This is often the earliest stage of a flashing failure, and the one most worth having inspected before it becomes a leak that shows up in every rain.
Staining in the Attic at the Chimney Penetration
Attic staining concentrated right where the chimney passes through the roof deck, on the framing or sheathing around the chase, is one of the more reliable flashing indicators because it is closer to the actual entry point than a ceiling stain one or two floors below. This location narrows the search to base or apron flashing at the downhill side of the chimney, or to a cricket that is missing, undersized, or failing on a wider chimney. If your attic is accessible, this is one of the more useful places to look with a flashlight after a storm, without going anywhere near the roof surface itself.
Rust Streaks on Siding or Masonry Below the Flashing Line
Step flashing and counter flashing are usually aluminum or galvanized steel. Both corrode over time, and corrosion accelerates where two dissimilar metals are in contact or where a protective coating has worn through. A rust-colored streak running down siding or brick, originating at roughly the flashing line, means the metal itself is deteriorating, not just the sealant around it. This is a different repair conversation than a resealing job: corroded metal needs to be replaced, not resealed, because the material shedding rust is also the material that is supposed to be shedding water.
Efflorescence on Interior Brick Near the Roofline
White or grayish powdery staining on interior brick, particularly on a chimney breast where it passes near or through the roofline, can look like a flashing symptom but often is not. Efflorescence is a sign of water moving through the masonry itself, evaporating at the surface and leaving mineral salts behind. This can be driven by flashing failure feeding water into the adjacent masonry, but it is just as often the masonry absorbing water directly through porous or spalled brick and open mortar joints with no flashing involvement at all. The chimney efflorescence post covers how to read that signal and where the water is most likely coming from.
Why a Chimney Without a Cricket Collects Water and Debris
Not every chimney sits at the peak of a roof. Many sit partway up a long slope, with a significant section of roof continuing uphill behind them. On that layout, every drop of rain and every bit of debris that lands on the roof section above the chimney runs downhill and hits the chimney’s uphill face directly. Without a cricket splitting that flow around both sides, water pools against that single wall, and leaves, seed pods, and roof grit collect there too, forming a small dam that holds even more water in place. That constant saturation works on the counter flashing joint and the mortar behind it far harder than the water hitting any other face of the chimney. Building code (icc-irc-ch10) requires a cricket behind chimneys above a certain width for this reason. On a chimney that is wide enough to need one and does not have one, the uphill flashing joint is usually the first thing to fail, and it tends to fail again after a repair if the cricket is never added.
Why Sealant Over Failed Counter Flashing Is the Wrong Fix
The most common repair attempt we see homeowners have already tried before calling is a bead of roofing sealant or caulk smeared along the counter flashing joint where it meets the mortar. It is an understandable fix: the gap is visible, and sealant is the obvious material to close a gap. The problem is what counter flashing is actually designed to do. It is not a sealed joint; it is a lapped, shingled system where the counter flashing overlaps the step flashing below it, so water sheds downward across the overlap under gravity, with no dependence on an adhesive bond holding anything watertight. Sealant papers over a symptom of that geometry failing without restoring the geometry itself. It also traps whatever moisture is already behind it. Through Chicagoland’s freeze-thaw cycling, a sealant patch typically cracks again within a season or two, often in roughly the same spot, because the underlying metal position and the mortar joint condition were never addressed. At that point the visible fix is gone but the water path behind it usually is not.
When It Turns Out Not to Be Flashing at All
Because several failure modes produce similar interior symptoms, it is common for an inspection to trace a “flashing leak” back to the crown, the cap, or the masonry itself. The why your chimney leaks when it rains post walks through the full set of entry points, including the ones that are not flashing, and how they interact on chimneys where more than one component is failing at the same time. A chimney inspection that checks the flashing alongside the crown, cap, and upper mortar joints is the only reliable way to confirm which component, or combination of components, is responsible before any repair work is scoped.
Schedule Your Flashing Inspection and Estimate
If your symptom matches one of the patterns above, the next step is confirming it, not guessing at a fix. Late summer and fall are a practical time to have flashing checked, before winter’s freeze-thaw cycling turns a small gap into an active leak.
Delta - Chimney Repair and Services handles chimney flashing repair across the North Shore and the northwest suburbs. We serve Mount Prospect, Palatine, Buffalo Grove, Schaumburg, and Rolling Meadows, along with the broader Chicagoland service area.
Call (847) 685-1043 or visit our contact page to schedule an inspection and a written estimate that identifies which component is failing before any repair begins.
Where the stain sits, not how big it is, is what tells you which flashing component failed.
Sources and Standards
- NFPA 211: Standard for Chimneys, Fireplaces, Vents, and Solid Fuel-Burning Appliances National Fire Protection Association Defines the three chimney inspection levels and the annual inspection standard.
- International Residential Code, Chapter 10: Chimneys and Fireplaces International Code Council Residential code for chimney and fireplace construction and clearances.
- Great Lakes Freeze-Thaw Climate Data GLISA, University of Michigan Freeze-thaw cycle data for the Great Lakes region.
- BIA Technical Note 19: Residential Fireplaces, Details and Construction Brick Industry Association Construction detailing for masonry fireplaces and chimneys.
Fact-checked against the above sources on 2026-08-21.
Pre-Heating-Season Inspection and Sweep (Aug-Oct)
Chimney work runs on a calendar. This is what matters for a Chicagoland home in the window you are reading this.
- The Annual Chimney Inspection: What It Covers NFPA 211's annual cadence means the inspection belongs before the first fire of the season, not after.
- Why Fall Is the Best Time to Schedule a Chimney Sweep Answers the exact timing question homeowners are searching right now, before appliances go back into daily use.
- Fall Chimney Checklist: Before You Light the First Fire A complete pre-season checklist for everything to confirm before heating season starts.
- Chicagoland Seasonal Chimney Inspection Timing: When to Book Chicagoland-specific timing guidance for when to book, tied to local weather patterns.
- Heating Season Chimney Safety for Chicagoland Confirms the flue is clear and the liner is sound before regular winter use begins.
- Holiday Fireplace Safety: Before You Light the Fire What to check before lighting the fire for holiday gatherings, when the fireplace sees its heaviest seasonal use.
- Carbon Monoxide and Your Chimney Carbon monoxide risk rises with active heating-season use; this covers how a chimney problem creates that risk.
- Chimney Fire: Warning Signs and Prevention Creosote accumulated over active winter use is the direct driver of chimney fire risk.
- Freeze-Thaw Damage: What January Does to Your Chimney Where winter's freeze-thaw cycling shows up as visible masonry damage each spring.
- Post-Winter Chimney Checklist for Chicagoland A structured checklist for what to look at once the freeze-thaw season has passed.
- Spring Chimney Inspection: Reading Winter's Damage The seasonal inspection built specifically around catching winter's damage before it worsens.
- Cracked Chimney Crown: Causes and Repair The crown takes the most direct freeze-thaw damage of any component; what a crack there actually means.
- Why Spring Is the Right Time to Rebuild a Chimney Mortar needs consistently warm temperatures to cure properly, which is why spring opens the rebuild season.
- Summer Is the Best Time for Major Chimney Work The case for why summer, not winter, is when masonry work should actually be scheduled.
- Chimney Masonry Repair: Brick, Mortar, and Crown The comprehensive masonry repair guide for the season when that work can actually be done correctly.
- Tuckpointing a Chimney: When Mortar Joints Fail Tuckpointing mortar needs the same curing conditions as a full rebuild, which is why it's a warm-season job too.
Once the problem is identified, cost is the next question every homeowner has before calling.
Chimney Flashing Repair FAQs
01 How do I know a leak is from chimney flashing and not the roof itself?
02 Why does my chimney only leak during wind-driven rain?
03 What is a cricket and does my chimney need one?
04 Is it safe to reseal chimney flashing myself?
05 Can rust streaks on my siding really be a chimney flashing problem?
06 Does chimney flashing repair cost less than a full masonry rebuild?
More Chimney Flashing Repair Guides
What Changes the Price of Chimney Work in Chicagoland
Why two contractors quoting the same Chicagoland chimney can hand you two different numbers, and what a homeowner should compare line by line before signing.
Read article Chimney RepairHow Weather and Lake Michigan Affect Chimneys
Lake Michigan chimney damage on the North Shore follows predictable patterns. Learn how lakefront climate accelerates mortar failure, crown cracking, and liner deterioration.
Read article Seasonal MaintenanceSummer Is the Best Time for Major Chimney Work
Summer chimney repair lets mortar cure properly, contractors are available, and you beat the fall rush. Here is why summer scheduling pays off.
Read article Chimney SafetyHow to Tell If Your Chimney Needs Immediate Attention
Chimney warning signs that require immediate action: smoke entry, carbon monoxide, active chimney fire, and structural failure. When to leave first and call emergency services.
Read articleHave a Question About Your Chimney?
Documented condition, a plain explanation, and a recommended scope before any work.